If you are looking to understand how combination locks work, or you already have access to the inside of a PO Box, you’ll probably enjoy Part 1 a lot more. This one gets into decoding the lock from the outside.
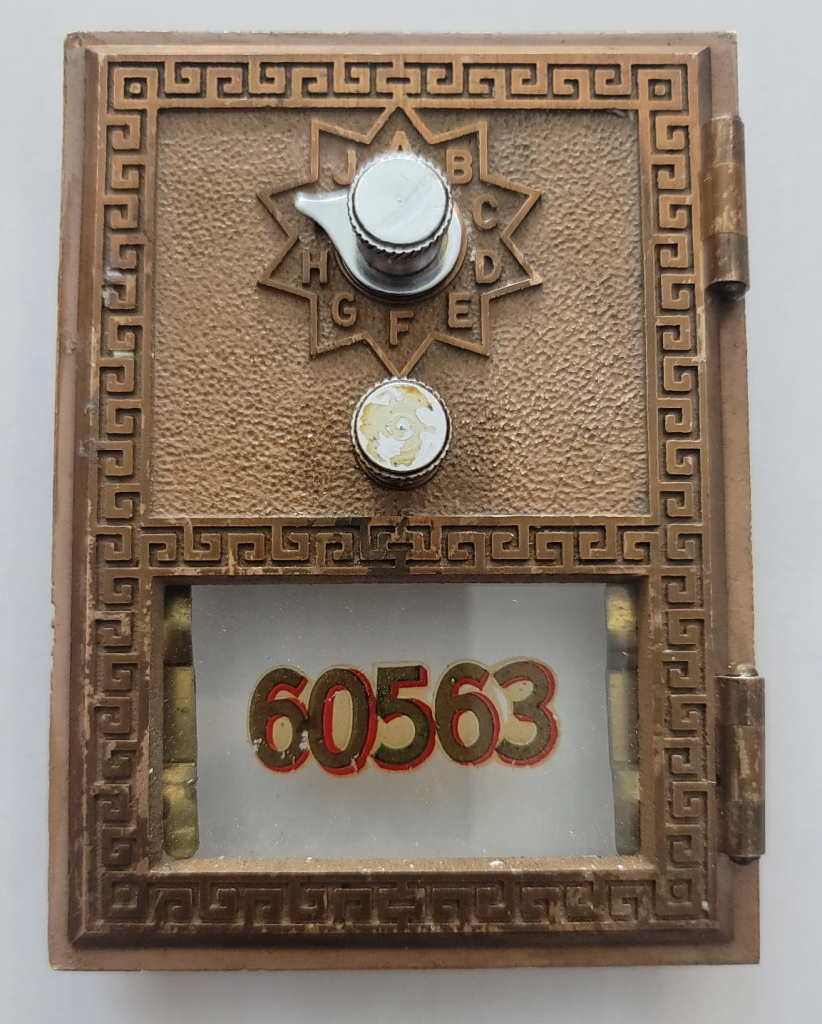
Before we start, lets just look at how ornate this damn door is. WOW.
So lets try and attack this with it closed and latched (or in my case, in my hand and no peeking). There’s a few approaches we can take:
- I’m assuming your unit is complete and the box it is in is opaque. If not, if there’s a 1/4″ hole in your box (or the glass is missing) go back to Part 1 after buying a cheap USB $20 borehole camera and go follow that blog.
- You can simply grind the bottom of the hinges open. On your house they pop out nicely, but these are folded over so it’ll be mildly destructive to open the box via this method — but it’s easy enough to replace if you have spare brass stock and can lap it over.
- You can try to shim it by advancing the latch (component breakdown is over in Part 1 as well). I am not going to do that for now, but It’s a lot like a padlock:
- If the lock uses ball bearings to lock into the shank, it is a superior lock because it cannot be shimmed (in theory). This is like an “interference” engine in the automotive world. Stuff is just in the way so you can’t push it out of the way without the key.
- If the lock uses an angled latch and you push the lock shut, even without the key, then that action used to push the padlock’s shank into place is the same action that will allow it to be shimmed.
Another option is to try and brute force the lock with a wee bit of intelligence. Something to note about this lock:
You will dial in three different values. These can be the typical A through J, or it can be “half” letters. So if the dial looks like this:

That’s a totally valid selection, and it would be considered as “BC” being the first “letter” or value.
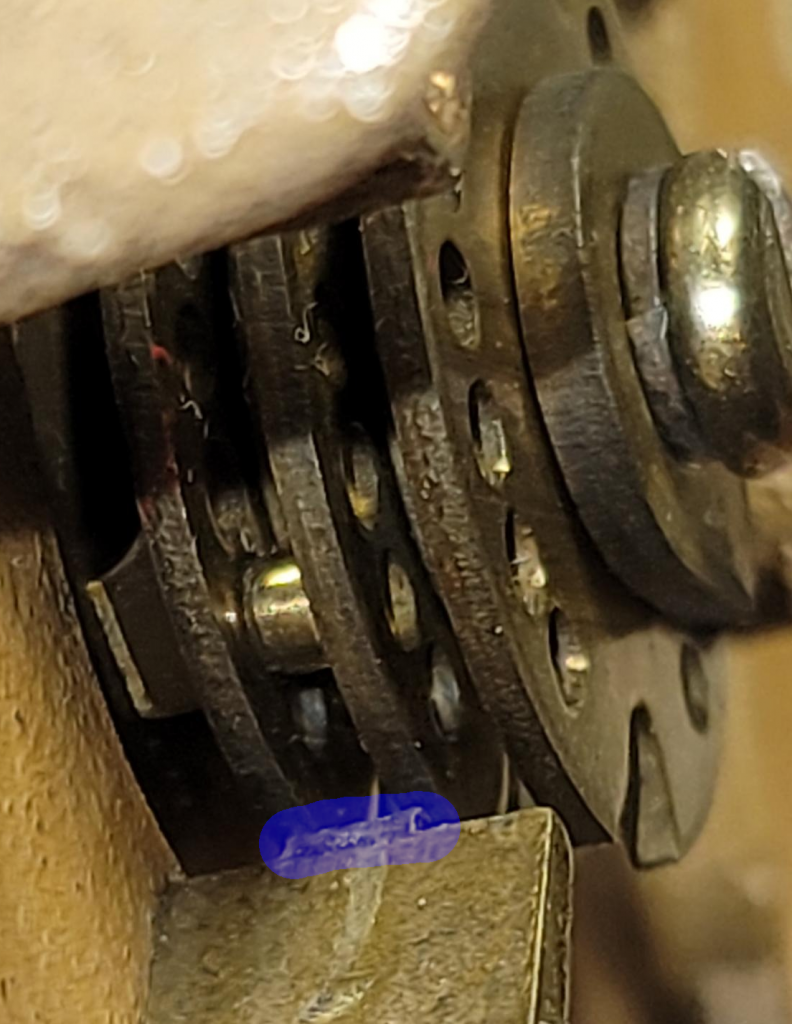
Another interesting part of this combination lock is the pawl:

In the center of the pawl, there’s a part that sticks out maybe 1/2mm beyond the rest of the tip of the pawl. The way decoding and lock picking tends to work is due to additive errors in manufacturing… The tolerances define the cost to produce a lock, as well as the cost to buy it. The sloppier the tolerances, the easier it is to pick.
In this case, if the pawl didn’t have that additional “nose” on it, then all three rotors would ride against the pawl at the same time. Master Lock’s old combination locks when I was in school (friggin’ 20 year ago now) were susceptible to this and I was able to get into a few lockers this way. See the “Fun Note” section at the bottom as to how I did it!
So if all three rotors are riding against it, we could potentially use our human skills to feel or hear when the rotor rides off the edge of a rotor (and into the valley created by the ward) and have this decoded much faster — or even use a more powerful microphone to listen to the units moving inside.
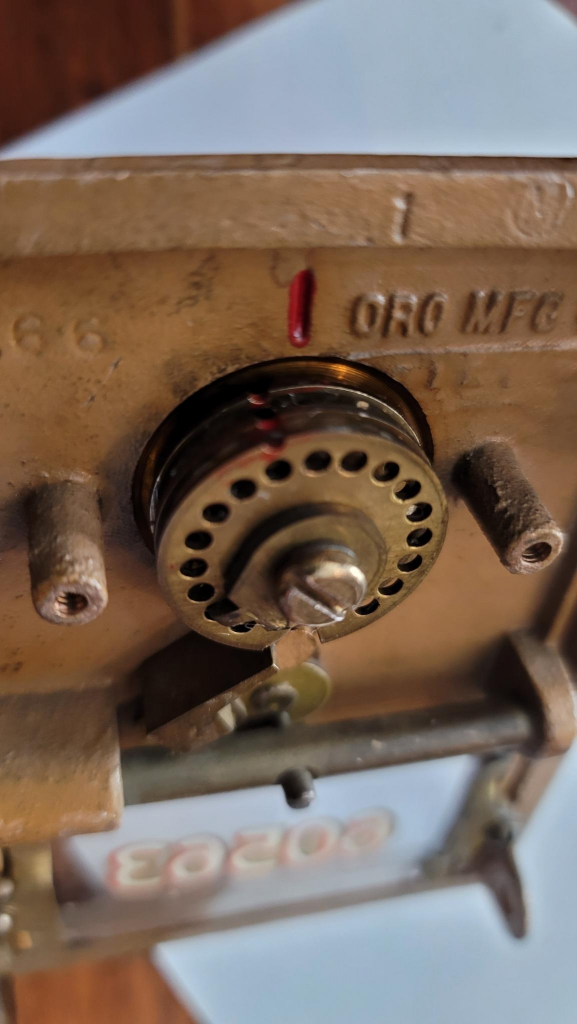
So, the “nose” may be a bit of a feature to prevent figuring out the rotors, with the exception of the second one. Also, the odd “alignment” marks may present a bit of an issue:

There’s enough of a detent here where the nose will fall into that and present what a lockpicker may call a “false set”. If you’ve used these combination locks enough, you’d easily observe that the pawl didn’t travel as much as usual and move on past it. This is the way we’ll decode this.
I’m not sure this is the fastest way, I’m sure others have better ways, but this beats brute forcing the lock entirely.
Getting the first letter
Unfortunately this is going to be the hardest to get. You’ll need to iterate here, trying all of the combinations:
A, AB, B, BC, C, CD, D, DE, E, EF, F, FG, G, GH, H, HI, I, IJ, J, JA
So let’s start with “A”, and we’ll need to repeat the next steps until we get an open.
Getting the second letter
This one is silly easy. You can do this without knowing the first. Simply turn the latch used to open the door and then turn the top knob until you feel the bottom knob pop forwards. There’s a good chance this is your second letter, however, remember there’s the red “alignment” marks, so it’s worth taking the tension off of the bottom knob, advancing the top knob slightly, and then reapplying the tension and searching for the next letter this happens to. Whichever has a more drastic motion is the second value/letter.
Getting the third letter / trying out the combination
Now you’re here:
- Guessing what the first letter is
- You know what the second letter is
- You want the third letter.
This is a brute force effort. It’s not bad assuming letter one and two are correct. You should just try each value:
A, turn bottom knob to open. Doesn’t? Try AB. Does? There’s your combination.
If none of these values are correct, restart, advancing the first value by one, then enter the known second value, and then iterate through the third set.
My combination ended up being:
BC – GF – B
Fun Note!
I’m not sure what the true source of the material was, but it was a text file I had on a 3.5″, 1.44MB floppy and everything was by the “Jolly Roger”. The text file was called the “Anarchists Cookbook” and has defined a lot of what I’ve done over the years. I have an old copy of an Esquire magazine and a Cap’n Crunch whistle due to nostalgia — maybe some folks will get this!.
Anyways, here’s the text I had used in 8th grade to open combination locks:
Picking Master Locks by The Jolly Roger
Have you ever tried to impress someone by picking one of those Master combination locks and failed?
The Master lock company made their older combination locks with a protection scheme. If you pull the handle too hard, the knob will not turn.
That was their biggest mistake.
The first number:
Get out any of the Master locks so you know what is going on. While pulling on the clasp (part that springs open when you get the combination
right), turn the knob to the left until it will not move any more, and add five to the number you reach. You now have the first number of the
combination.
The second number:
Spin the dial around a couple of times, then go to the first number you got. Turn the dial to the right, bypassing the first number once. When you
have bypassed the first number, start pulling on the clasp and turning the knob. The knob will eventually fall into the groove and lock. While in
the groove, pull the clasp and turn the knob. If the knob is loose, go to the next groove, if the knob is stiff, you have the second number of the
combination.
The third number:
After getting the second number, spin the dial, then enter the two numbers. Slowly spin the dial to the right, and at each number, pull on the
clasp. The lock will eventually open if you did the process right.
This method of opening Master locks only works on older models. Someone informed Master of their mistake, and they employed a new
mechanism that is foolproof (for now).
Leave a Reply