
A few weeks ago I took a trip to a local antique mall here in Texas. It’s been a few years since I’ve been to one and last time was to find old school padlocks to pick.
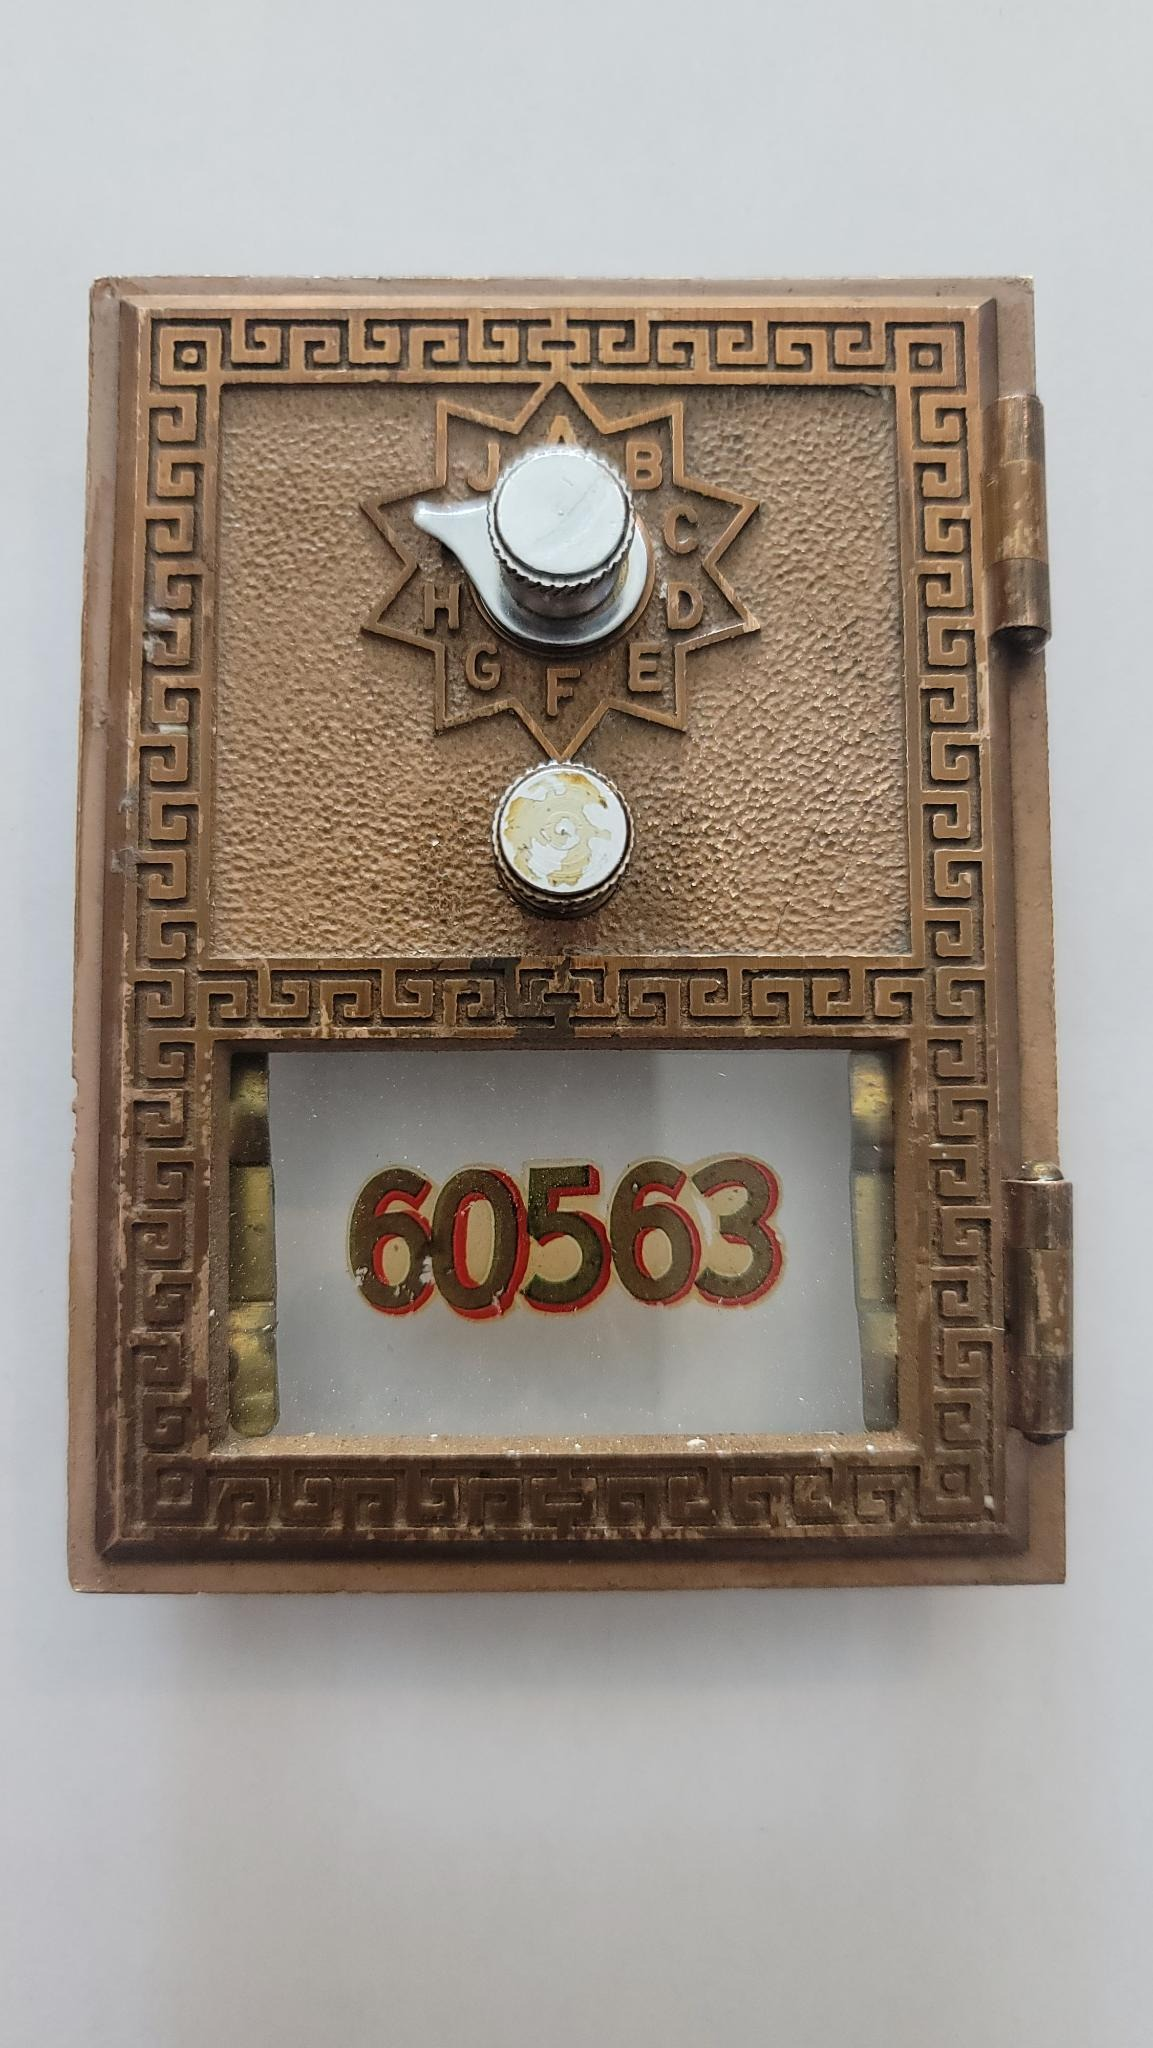
I found this USPS PO Box door (presumably box #60563) for sale for $20, along with several others. I wish I bought two.
Word of Caution: If you understand how combination locks work, this part will be much less interesting. Part 2 will go into decoding them with the door closed ;).
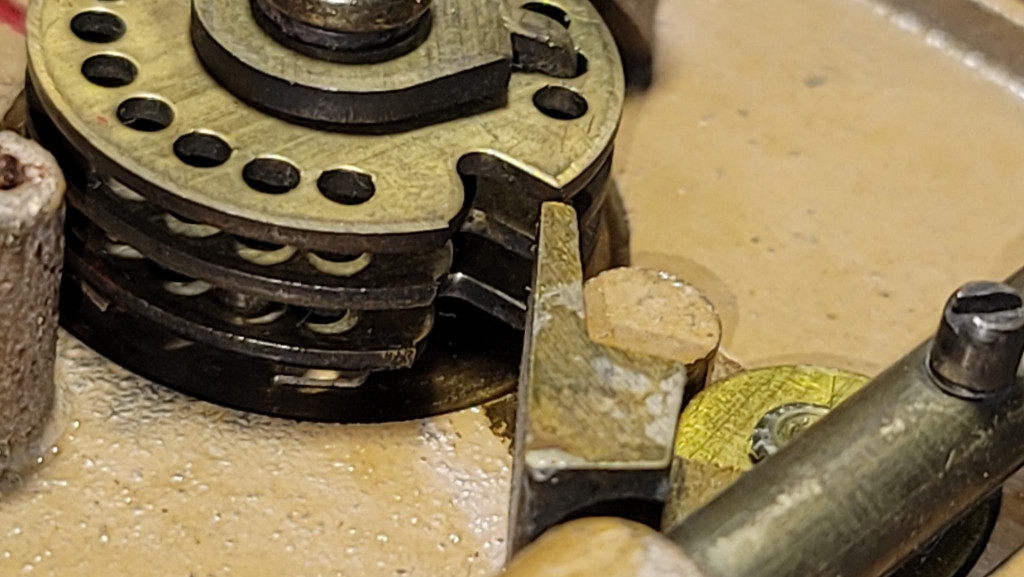
With the door open (remember kiddos: physical access is root access), lets flip it over and look at what we have:
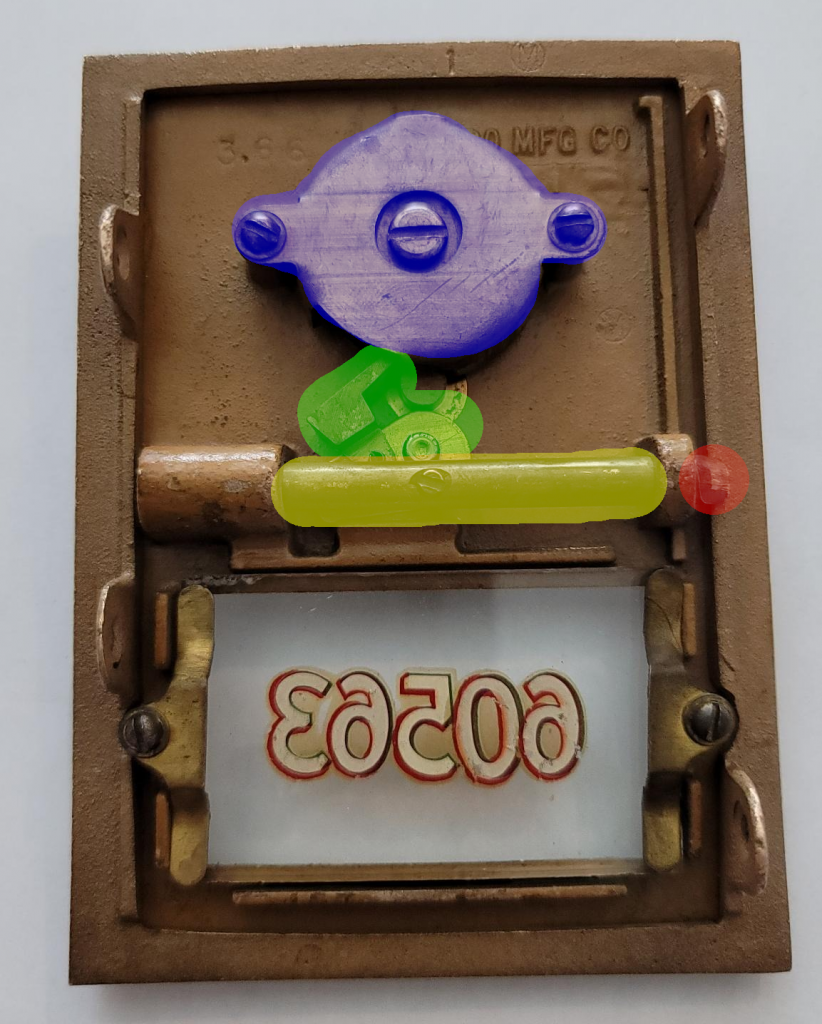
Using a bit of color overlay, we’ll refer to these parts at a high level:
Blue: Rotors — this is the part that rotates when you turn the combination knob. It contains three discs, with pawls, a red alignment mark (not visible) and a “ward” for lack of a better term where the green bit sticks into.
Green: Pawl — This is the part that stands between you and an open — it needs to fit within the ward to accept the combo, and move out of the yellow bit.
Yellow: Slider — yes, red and yellow are the same piece, but the slider is what engages with the Pawl (green).
Red: Latch — This is a tapered piece of brass — much like a door latch, that allows you to close the door without re-entering the combination. In many locks, this is a downfall because you can depress the latch manually and open it with a shim or a picking tool. I’m positive it can be done, I’ve yet to try.
I want to reinforce that this is DECODING. In this case, we have access to the lock internals so we can see what is going on. You can also decode this lock without having access, more on that in Part 2.
Step 1: Viewing the Rotors

In my image above, you can see at least two of the rotors (discs with holes in them).
Unnecessary, but not difficult, you can simply remove the cover off the rotors:
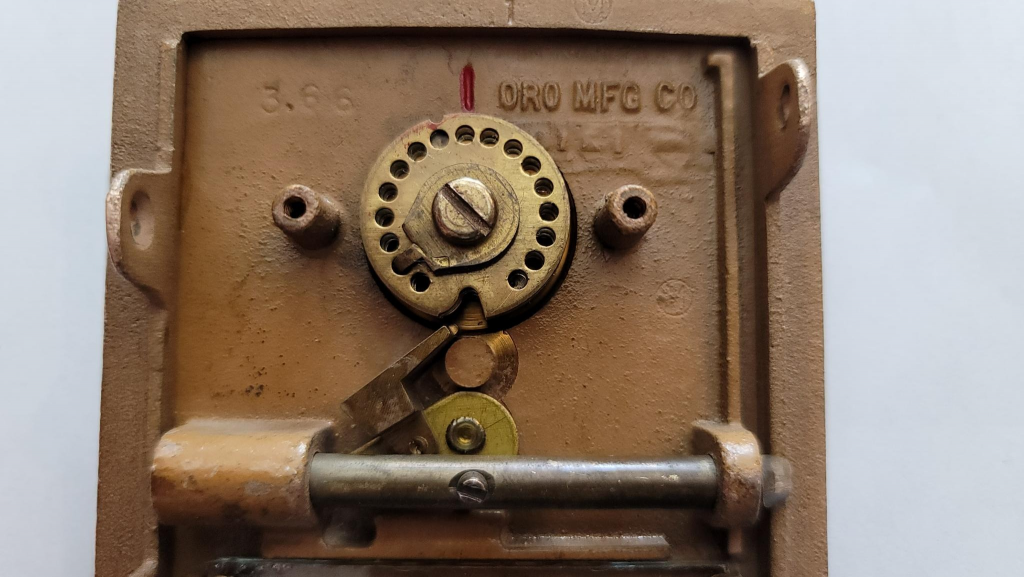
Here, we observe a few things:
- The rotors (all three) are set and ready to open this lock, as evidenced by the the notch (ward) in the rotors. Back on the front, I’d only have to turn the bottom silver knob and I’d be “in”.
- The top rotor has a screw in it that has a tang. If you rotate the combination knob, this is a “driven” rotor meaning the last letter will be selected by this rotor and the placement of that tang within the notch.
- The red line is engraved into the body and into the tops of the rotors (harder to see here). I assume this is for some sort of alignment since these locks seem “programmable” or “changable” in the field.
So, easy way to “Decode” this, while looking at the rotors is to:
- Spin the combination lock clockwise (ideally over a few turns) until the bottom rotor (the first letter) aligns with the pawl
Now, flip it over and see what the rotor shows (what letter). Note that this is kind of weird, because there are letters A through J, but you may land right in the middle of two of them. Let’s say you’re right between G and F, the code then is “GF” for the first rotor.
- Next, rotating counterclockwise, align the second rotor (the middle one). You’ll probably notice that your spinning action is only moving the top rotor at first — this is how combination locks work (more on that in a few).

Now, we have the pawl aligned with the first and second letter — and you can see the odd red alignment mark on the last (top) rotor. In Part 2 I’ll talk more about why I think that exists. Write down the second letter(s) of your combination.
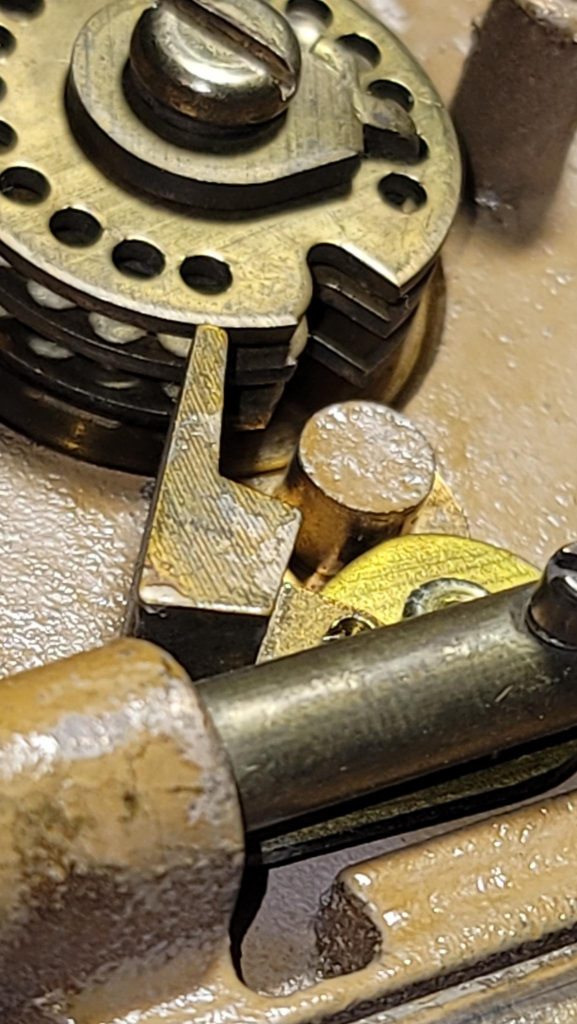
- Finally, heading clockwise again, spin until the top rotor is aligned
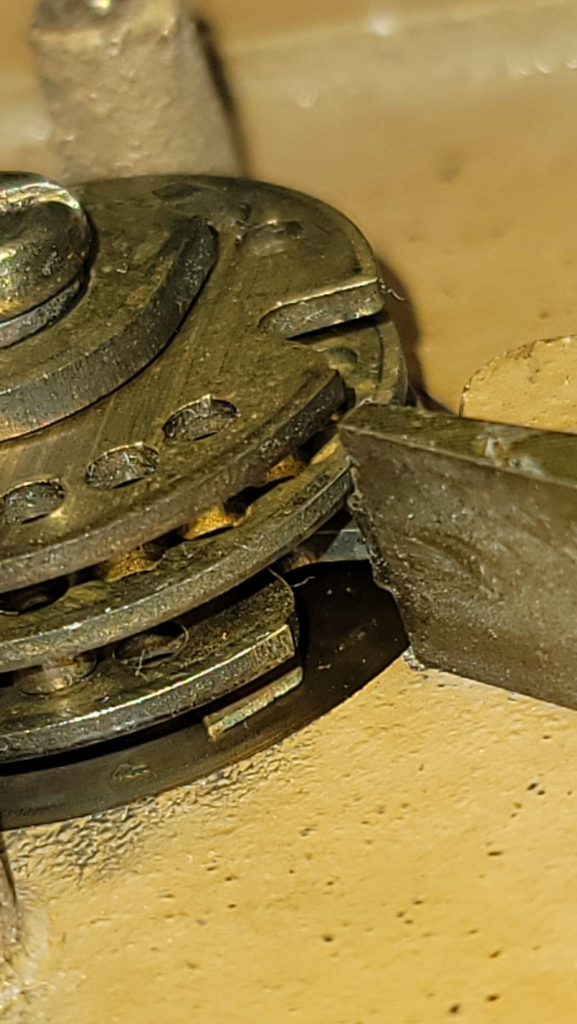
Now, write down the last letter(s) of the combination, and THEN try to see if it opens. Once you open it, you’ll notice it pushes the rotors slightly, effectively “clearing” the code and making it so you don’t need to spin the combo wheel to clear it when you’re done. Still not a bad practice. See the next few pictures for how that works:
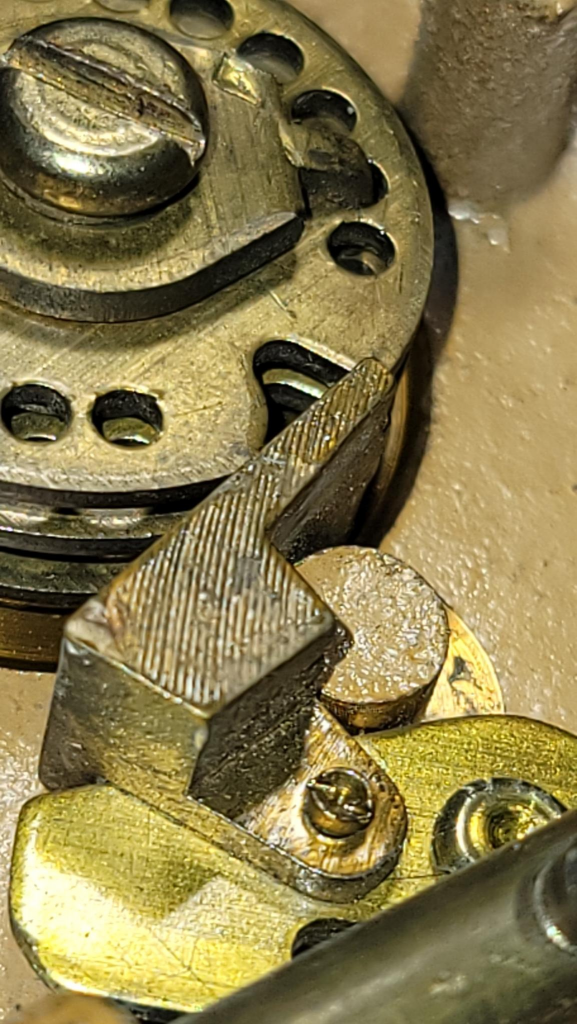
Pawl actuated, latch opened, and rotors advanced
By letting go of the bottom knob on the front, the pawl retreats back to its default position thanks to a spring on the slider. Now, simply trying to open the PO Box again will fail.
So how do the rotors work?
Explosives are one way to open a locked box, but you know what’s a whole lot cooler?
EXPLODED DIAGRAMS
SHAZAM
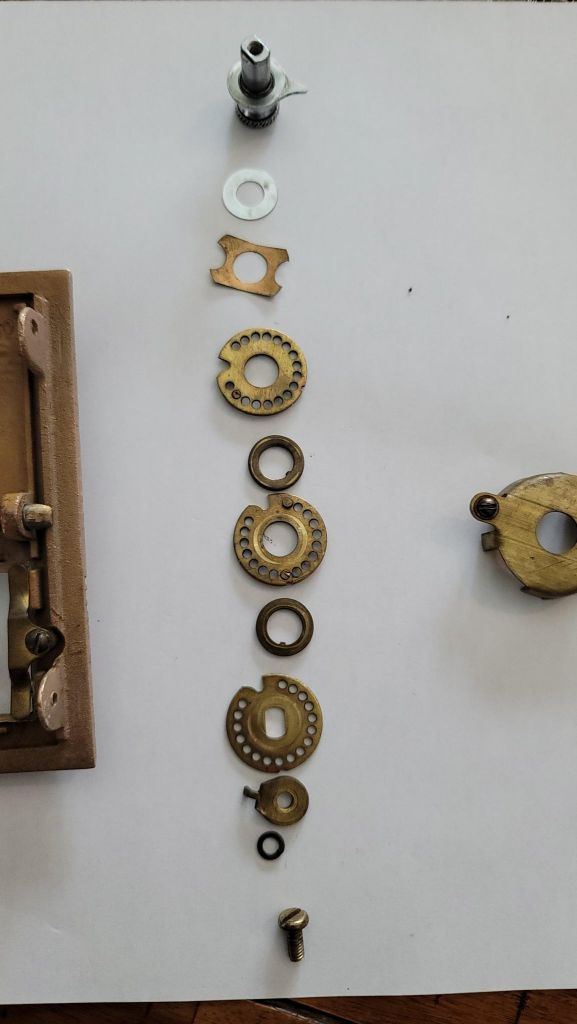
Working from the top of the image down:
- Knob — this is the part you grab and turn — the tang on the side indicates the letter on the front and slides through the front panel, but not until is gets through the…
- Washer — Simply reduces friction and spaces the knob off of the faceplate a touch
- Faceplate (not pictured in order) — This would fall here, with the beautiful engraved letter rosette
- Spring — This looks like a weird washer with arms, but what this does is apply a positive bias between the faceplate and the rotor stack. Without it, you could potentially still open the combo, but bumping it could displace them, the turning pressure of the knob could also move the rotors around and would end up making a much more difficult combination lock to use.
- Bottom Rotor — This is the first letter you’ll select when opening this. You’ll notice one of the holes are plugged — this correlates to the first letter of the combination when you open it. Since there’s no fourth rotor, only the one plug here (or tang) is needed to “receive” the pushing action of the middle rotor.
- A keyed washer — This time, it’s a washer with a little pimple — or key, that causes it to rotate along the knob. The knob’s tailpiece isn’t a circle, it has two flat faces that these ride on.
- Middle Rotor — The second letter you’ll select. This one notably has two holes plugged, again helping indicate the correct letter in the middle while also driving the bottom rotor by the action of the top rotor. You can calculate the letters by simply looking at the rotors, since the main piece of information you need is:
- All the tang/plug placement
- Some math to figure out the distance traveled by turning the knob
- Another keyed washer — Yes.
- Top Rotor — The last letter you’ll select. This one is a bit more unique. There’s no visible pawl/tang/plug/bump/pimple. It does have a keying to the center hub, however, so it is directly driven by the knob, ignoring the center hub it looks like a humble rotor. Except…
- Tangy Bangy Thangy — This part is screwed in by the last two pieces. It also has a tang that sticks through a rotor hole in the top rotor, acting as the missing pawl.
- Lock washer — It would be mildly inconvenient if the lock fell apart, lock washers present a force against the screw and knob’s tailpiece resisting being loosened over time.
- Screw — Holds it all together.
So, as you turn the knob, the Top Rotor is turned since the center hub is keyed to the knob’s tailpiece. This, in turn, turns the TangyBangyThangy since it is shoved into the rotor’s hole. It also sticks through the hole far enough to interfere with the middle rotor’s plugs. This is what drives the second letter, however we can’t do the second without doing the first, so as we continue to spin, the other plug in the middle rotor engages the bottom rotor and allows us to select the first letter.
Spinning backwards now, to:
- Take up the slack of the top rotor
- Align the middle rotor with the pawl
We eventually end up at 2/3 solved. Finally, spinning clockwise again, we:
- Spin not far enough to re-engage the middle rotor’s plug
- Spin just far enough to align the ward in the rotor.
And that’s how a USPS PO Box combo lock works, and also how you can decode it from the secure side.
If you enjoyed this video, like and subscribe — and while you’re there, do me a favor and slap that bell icon. If you got this far and realized this isn’t a video but a blog, good reading skills.
Leave a Reply