Wayyy back in the day, my parents had gotten me a computer kit for Christmas. I had meticulously assembled it, all of the headers for power / reset buttons and LEDs, the PC Speaker, everything, were ran along the underside of the motherboard and taped down., the power cables were tie-wrapped to the right size. This thing looked like you could eat a steak off the inside. I was probably 12? 13? I was pretty young. But at that point, combined with my then ~6 years of QBASIC and Visual BASIC experience, I thought I ruled the world when it came to computers. And, in fairness, it has worked out well for me over time (#linkedIn #humbleBrag).
What I didn’t realize at the time is plugging a bunch of cables into keyed holes that you couldn’t really screw up was really damn easy. The power supply’s cable has one-directional cables. The IDE cables at the time were both keyed by pin and a hump in the middle of the cable. Sure, I could have conflated master and slave — but my father had taught me when I was probably 7 what the cable did, how to set jumpers, and that the master drive (C: in Windows) was the end of the line, and the slave (D:) was in the middle.
Possibly the hardest part was the jumper blocks, since those took the square “DuPont” connectors and added them to pin headers. Except those were actually pretty hard to screw up too.
Then, once I passed the magic smoke test of power on, the brilliance I had shown again: I inserted a Windows 98 CD and hit “Next” a bunch of times.
The cool thing about evolving is that you look back and know you knew “everything” at a point, and then you see yourself and realize you knew nothing. I hope I’m still there because I want to keep learning.
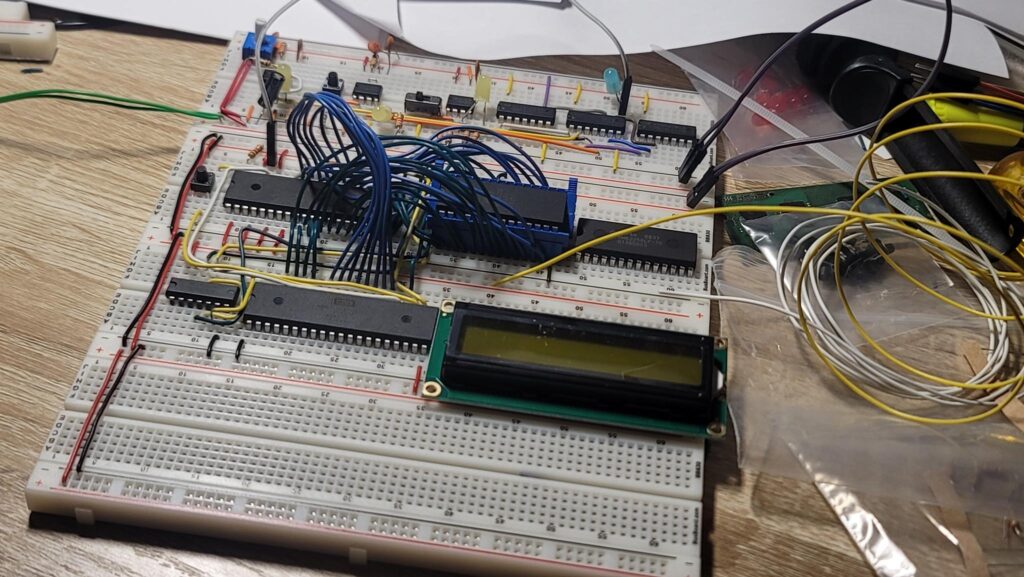
But for now, it’s time to build a computer that’s a lot more “building” than a few connectors. So, here I am:
My father worked at a pretty big communications manufacturing company. He would sometimes come home with the fruits of that company’s garbage. The first computer he came home with, at least that I remember, was an IBM 5150:
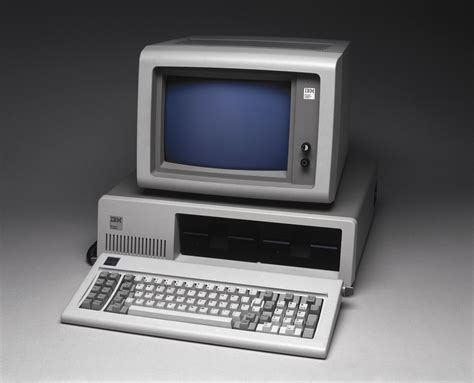
This damn thing was SLOWWWWWW. Like, play a basic game? Cool, type the command in and it’s 4.88MHz processor would take until you were done eating dinner to load and be ready to play. But — it was good enough for 7 year old me to learn how to do some basic (literally BASIC) programming.
Next, I recall a Compaq 386/16 Deskpro. I recently actually bought one again. Maybe I’ll share more in the future on that.
Anyways, the point being is that I’m building a system that is technically slower than that.
The system I’m building, as of right now:
- Variable clock. There is a custom clock on it, that can go from manual pulse to less than 100 Hz. As I build the project, I’ll add the 1MHz crystal it came with. The processor does support up to 17MHz, however I’m not sure that’s a good idea considering the impedance and conductivity of the breadboard, and the crosstalk of the wires themselves.
- Has 32K of ROM (actual program space)
- Some RAM, and a very small screen.
Now, if this sounds (and looks familiar) that’s because I bought a kit from Ben Eater. I’m shocked at how easy this is to build, and his YouTube videos are incredibly clear. This isn’t a product of me — I’m simply replicating what I see on YouTube. But, I want to learn this and perhaps build an 8088 like I had as a kid one day.
If you have ever wrote software, I’d encourage you to try this. It does require patience and a tenacity for troubleshooting. It’s worth learning.
A few images of my progress up to that point:
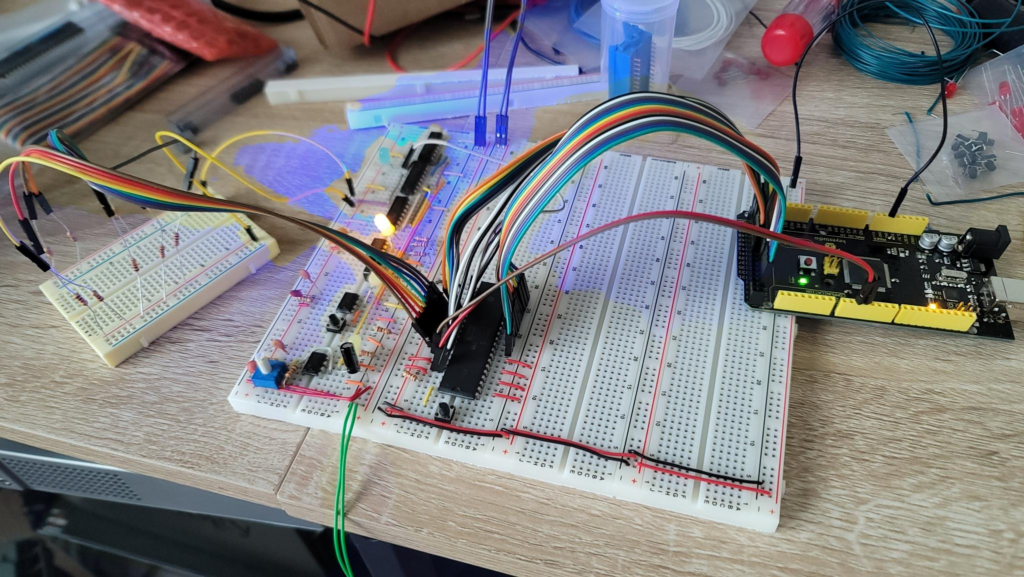
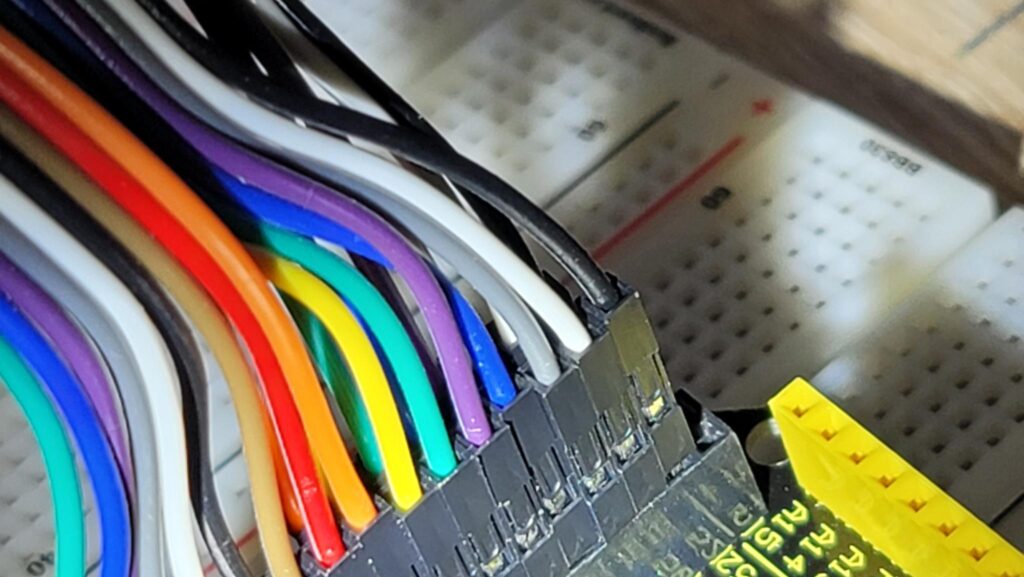
Here’ I’ve added a breadboard I had laying around. I’ve “hardcoded” (in the most literal sense) the NOP instruction. This took 10 wires, a positive, a negative, and eight data lines to the processor reading, through a 1K Ohm resistor, various bits that added up to 0xEA. This tells the processor, as Ben put it, to “Successfully do nothing, forever.”
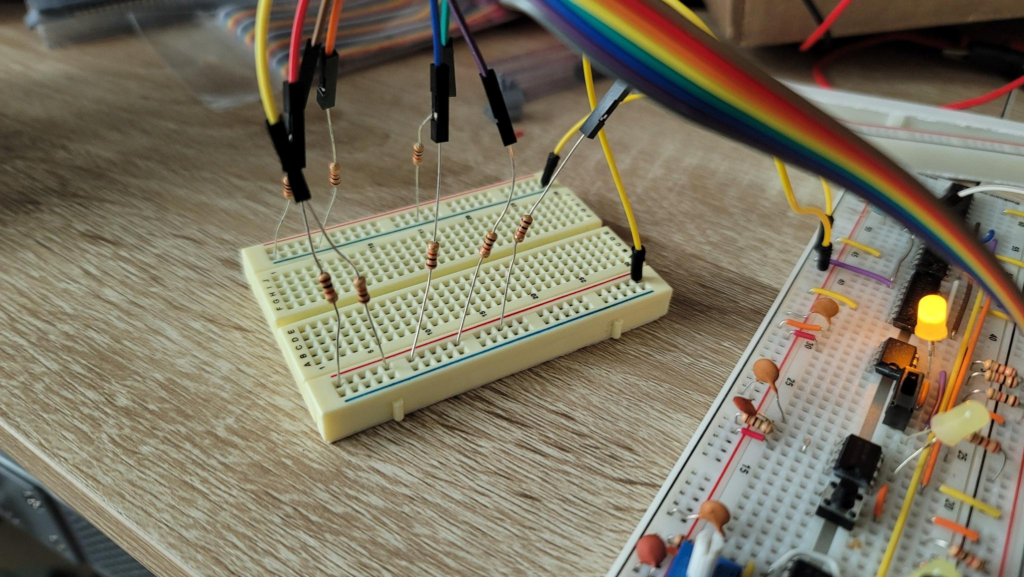
Closeup of my “NOP” module. also attached to them are “Dupont” connectors.
While building this, I had some really frustrating experiences. It really sucks getting 16 address lines, 8 data lines, and three others (PHI2, RWB and Ground) all hooked up to a microcontroller to read the current data.
Especially when you’re me and you see that it’s hooked to the digital bus of the microcontroller, and polling the pins in this order:
22, 24, 26, 28, 30, 32, 34, 36, 38, 40, 42, 44, 46, 48, 50, 52Then, realizing that the processor must be bad because nothing works.
And then later realizing that I hooked up the 22 to A0, and 23 to A1 (etc) to the processor and realizing the video must have hooked it up backwards to what I did.
Even more frustrating is when you reverse the microcontroller’s code (because fixing wires sucks) and you eventually see two bits flipped and can’t explain it until a bit later:
It might take you a few times. It sure took me like 12 times. ROY G. BIV? Nah… I flipped “Indigo” (purple) and blue. So those bits read wrong. The processor didn’t care and it worked fine, but my readout was quite wrong.
Anyways, I’m at the point now where I’m hooking up the display soon, so back to that!
Leave a Reply